Pavingstones Sold. Over 3 BILLION!
Ultimate DIY Halloween Outdoor Decor
October 16, 2017Halloween is creeping up around the corner. If you love decorating for Halloween, you probably look forward to finding new decorations to incorporate with your old favorites. If you're looking to update your outdoor decor with something a little different this year, be sure to check out how easy (and fun!) it is to turn your Cambridge entryway into the "must see" house on the block. Be warned: your home may become very popular on Halloween! Make sure you have enough candy to hand out ;)
DIY Halloween Outdoor Decor ready for ghost and goblin trick or treaters:
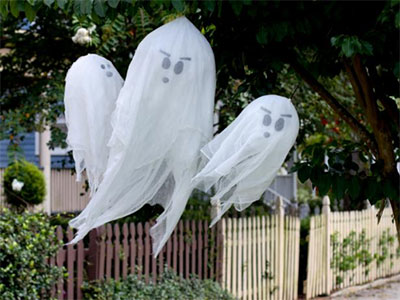
1. Floating Ghosts
What you'll need:• White balloons (Preferably foil balloons)
• Cheesecloth
• Black duct tape
• Scissors
Directions:
1. First, fill up the balloons with air or helium and tie a string to the end of each one.
2. Next, set the balloons aside and cut 6 pieces of cheesecloth for each balloon into various lengths. Two short pieces, two medium pieces and two long pieces.
3. Create a hole in the center of one of the short pieces of cheesecloth and thread the string through the hole to eventually cover the balloon completely
4. Repeat this with the rest of the pieces in an alternate order so that the cheesecloth pieces are draping over the balloon in layers.
5. After the last layer has been draped, it is time to create the face. Cut two small pieces of black duct tape into rectangles to create the eyebrows and cut three oval shapes to create the eyes and mouth.
6. Arrange these onto your second to last layer of cheesecloth, pull the top layer of cheesecloth back over the face and you are ready to hang!
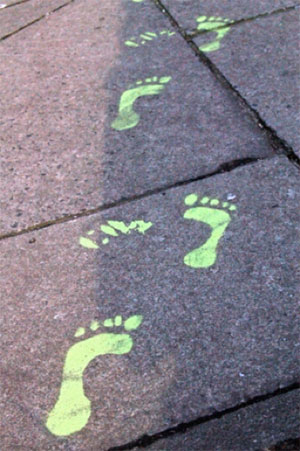
2. Bloody Footprints
What you'll need:• Washable red paint or glow in the dark paint
• Towel
Directions:
1. This is a simple but very cool looking Halloween decorating idea! Step into your washable red paint or glow in the dark paint with bare feet
2. Next, carefully walk towards the front door. The paint may run out after the first few steps, so carry it with you and reapply as needed!
3. Last, make sure to have a towel waiting for you at the end of your Cambridge walkway for easy cleanup!
Trick or treaters will appreciate this creepy addition of bloody footprints guiding them right to your front door!
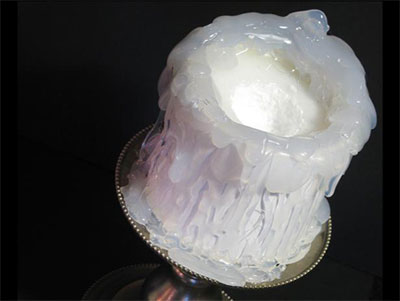
3. Faux Dripping Candles
What you'll need:• PVC pipe
• Styrofoam sheet
• Candle stands
• Glue sticks
• Wax paper
• Battery-operated tea lights
Directions:
1. First, cut your PVC pipe into shorter pieces resembling the size of a candle. If you'd like to get creative, you can cut one end at an angle making it look melted on one side.
2. Next, take your Styrofoam sheet and cut it into a circle to fit inside your PVC pipe. In order to get a more accurate shape, press the PVC pipe onto the Styrofoam to make an impression and cut it out accordingly.
3. Press the Styrofoam piece into the PVC so that it is not visible, and place a sheet of wax paper under the PVC.
4. After that, start applying hot glue to the top and sides of the PVC pipe, mimicking the way a real melted candle would look. Press the Styrofoam piece into the PVC tube and place a sheet of wax paper under the PVC.
5. Let it sit until the glue has cooled. Once it has, peel off the wax paper from under the faux candle
6. Last, turn on and place the battery-operated tea light in the center of the candle on top of the Styrofoam. You can just place it there or use a drop of hot glue to place it still. Now you can place your faux dripping candles throughout the sides of your Cambridge walkway leading to the front door.
Photos courtesy of:
http://www.diynetwork.com/how-to/make-and-decorate/crafts/how-to-make-hanging-halloween-ghosts
http://www.diynetwork.com/how-to/make-and-decorate/decorating/halloween-decoration-how-to-make-a-faux-dripping-candelabra